Tuesday, September 27, 2011

Deff Korps Orks, using the Greatcoat Ork bodies from Kromlech and Sheep's painting scheme for his Death Korps. I'm really digging the colors, and a whole ton of these guys would be pretty sweet.
 

~iPaint

Friday, June 17, 2011

Dark Eldar Army Challenge - Preliminaries and Other Stuff

 So, as part of The Independent Characters' Hobby Progress Challenge, and also to keep this blog alive and kicking, I present the first installment of my Dark Eldar army.

The idea behind the Challenge is to create an 1850 pt 40k army list with a minimum 400 pt sideboard, then assemble and paint it before Adepticon 2012, in March. Details are here.

So, without further ado, the list as it currently stands. I've been mulling over whether to go Nightshields over Flickerfields for the Ravagers, and drop the Flickerfields on the Raiders and use Shock Prows and Grisly Trophies on a few of them. This could then possibly get me one more Wych in the squad of 8.

Anyway....

HQ
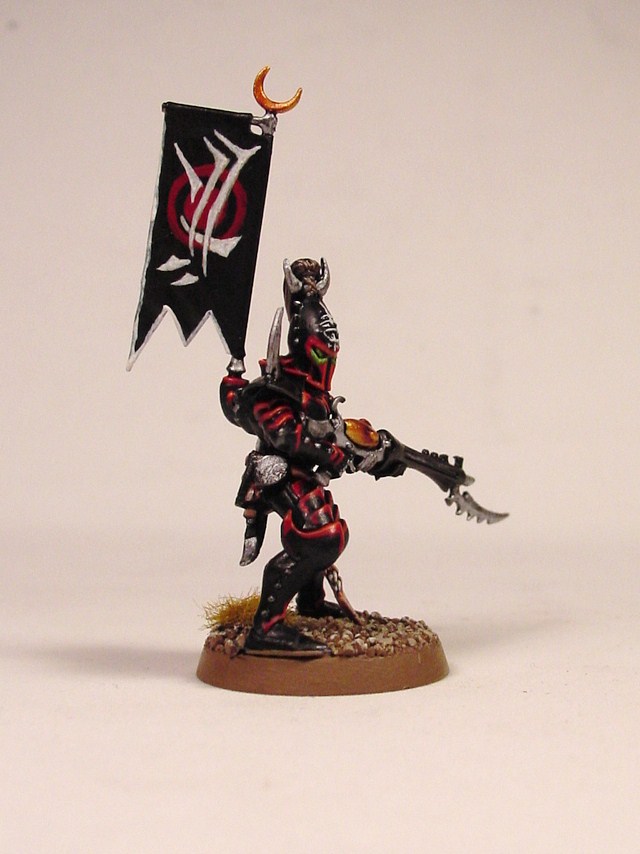
110: Archon - Venom Blade, Clone Field, Phantasm Grenade Launcher
60: Haemonculus - Liquifier Gun

Elites
185: 5x Incubi (Raider - Flickerfield, Shock Prow)
173: 4x Trueborn - 4x Blaster (Venom - Splinter Cannon)

Troops
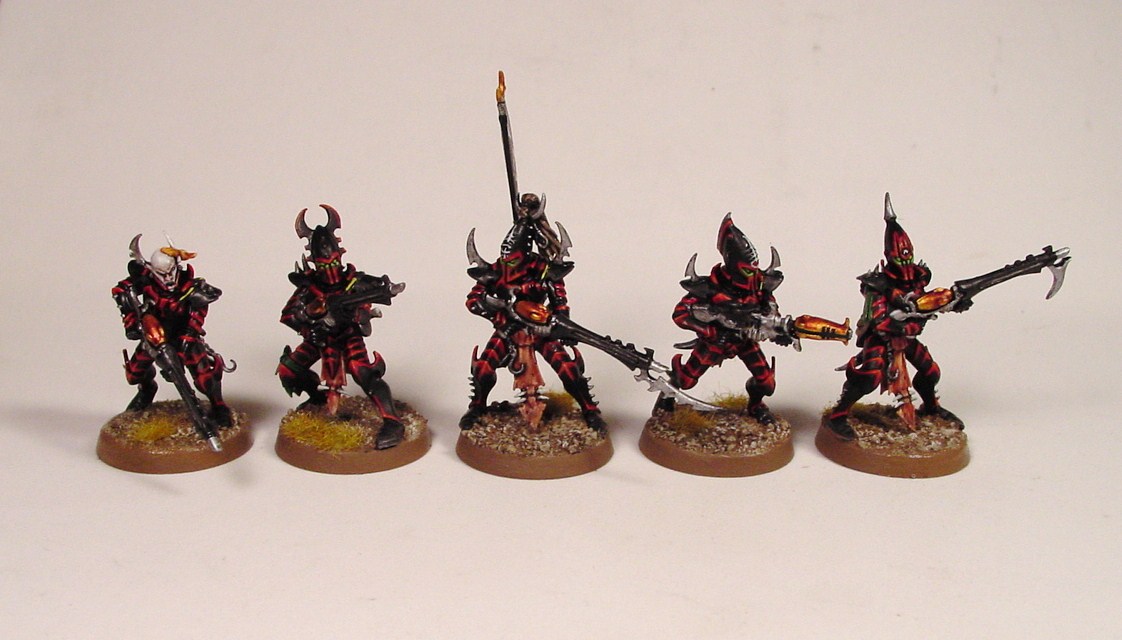
125: 5x Warriors - Blaster (Venom - Splinter Cannon)
188: 9x Wyches - Haywire Grenades, Hydra Gaunltet (Raider - Flickerfield)
176: 8x Wyches - Haywire Grenades, Hydra Gaunltet (Raider - Flickerfield)

Fast Attack
110: 5x Scourges - 2x Haywire Blasters

Heavy Support
115: Ravager - Flickerfield

Sideboard
180: 10x Warriors - Splinter Cannon (Raider - Flickerfield, Splinter Racks)
188: 9x Wyches - Haywire Grenades, Hydra Gaunltet (Raider - Flickerfield)

And, as part of the Challenge, I will be submitting first and last of the month updates to show progress. I am also required to plan out what I will be doing each month, so here is that.

June:
Purchase (hopefully - if not purchased in June, model will be purchased in the month it is scheduled to be painted) Archon, 3 more Venoms, 2 Scourge boxes, and an extra haywire blaster. Convert 4 Blasters out of Shredders for Trueborn. Assemble/prime as much of army as possible.

July:
Paint 3 Raiders, 5 Scourges

August:
Paint 17 Wyches, 5 Incubi

September:
Paint 3 Ravagers, Archon

October:
Purchase Urien and a Haemo, assemble/convert as needed, and paint them. Paint 4 Venoms.

November:
Paint 30 Warriors

December:
Paint remaining Wyches and Raiders, plus anything else that got left behind.

January - March:
Finish any last details / models I may add as needed. Really hard to plan that far out. I imagine there will be some things completed early, so hopefully I can add some of the fun stuff like Wracks/Razorwings here. Army will be based/sealed as models are finished.

So there we go. I'll drop some pics of my Scourges soon, and the Raiders.

~iPaint

Thursday, January 27, 2011

40k: Ork Battlewagon Painting Tutorial - Part 2

Part 2 is here!

Take your ram and basecoat the teeth with Dheneb Stone.


The Battlewagon is then sprayed entirely with a gloss varnish and let to dry for a few hours. Next, grab your oil paints and some thinner. I use Daler-Rowney Black, Burnt Umber, and Raw Sienna for my weathering process. Create a 1:1 mix of Raw Sienna and Burnt Umber, and then thin it to a wash consistency using your paint thinner. Apply this wash over all of the model and let it dry for a few hours.

Once dry, create a 1:1 mix of Black and Burnt Umber and thin it to the same consistency as before, and repeat the process of applying the wash all over the model. Oil paints create a nice dirty finish that is excellent for mimicking grease, grime, dirt, and all the other stuff that would dirty up an Ork vehicle.

I only did these two coats, and already the model is starting to look great! Feel free to add more and more coats of oil paint, focusing on the areas where dirt and grime would accumulate. When you're satisfied, seal  the model with a matte varnish. This will prep us for the next part - acrylic washes.


I will be using Games Workshop's Citadel washes from here on out, and having a matte seal on the model will allow my washes to settle properly on the model. Using Badab Black, apply a pin wash across all of the rivets on the model. Pin washing involves using just a little bit of wash on a small brush and dabbing just around small details. This will make the rivets pop a bit more.

Devlan Mud and Gryphonne Sepia are applied to the metal areas to create some extra rust and weathering. Skull White is streaked across the teeth on the ram.

 
Take a 1:1 mix of Chaos Black and Bestial Brown and sponge it onto the teeth like we did in Part 1.


Finally, paint in Chainmail to create exposed metal areas where the grey-brown is thickest. Wash the teeth with a 2:1:1 mix of water, Devlan Mud, and Gryphonne Sepia.

 Lastly, take some Sunburst Yellow and stipple it onto the Iyanden Darksun areas. From here on out, it's just a matter of whether or not you think there's enough weathering on the Battlewagon.


And here we are! I've painted up the crew following my previous Ork painting guide. In Part 3 we'll add some pigment effects and some mud and dirt.


~iPaint

Wednesday, January 26, 2011

40k: Ork Battlewagon Painting Tutorial - Part 1

Hey guys, been a while, but I'm back with a new tutorial, this time for an Ork Battlewagon. This will be a multi-part tutorial, so be sure to check out the future installments as work continues.

I've long been a fan of Orks, and as any Ork worth his green hide knows, "Red 'uns go fasta!" So, we will be painting this Battlewagon as either a Kult of Speed vehicle, or simply your favorite clan's Battlewagon with a Red Paint Job. I've gone ahead and clipped, cleaned, and sub-assembled the model to allow me to start painting with as few basecoats as possible. So, without further ado, on to the tutorial proper.

Part One:

*Notes on Assembly

I've decided to use a sub-assembly method of painting this miniature, and the reasons are two-fold. One - I want to minimize the number of times I basecoat pieces, and two - it allows for maximum interchangeability depending on what I want my model kitted out with.

Everything was sprayed with Krylon Flat Black to start with. I then sprayed the main cab, crew compartment, and body of the wagon, as well as any turrets, the ram, and other options, with Rustoleum Flat Paprika. The tracks, exhausts, and any metallic plates were then sprayed with Krylon Matte Aluminum. I let each coat of spray set for about two hours before applying another coat. Be sure to spray in a ventilated area, and place some newspaper down or use a spray box.

For Part One of this tutorial, we will focus mainly on the hull of the Battlewagon, so set aside your wheels, tracks, and other pieces. We just want all of our red pieces right now. Here we have the main hull of our Battlewagon sprayed Paprika. Any methods used on the hull will work just fine on any of the other red pieces, such as turrets and the ram.


Our first step to dirtying up our wagon is to apply a 1:1 mix of Bestial Brown and Chaos Black all over our model using the sponge technique. Grab a piece of blister foam or a Brillo pad and dip it into the paint mix, then wipe some of it off on a tissue. Then, dab the foam across the model, focusing on where grease, dirt, and the elements would wear away at the paint. Be sure to vary the application of the paint for the best effect.


Next, we will apply a basecoat of Chainmail over the metal parts underneath the hull. Iyanden Darksun is used to paint on dags, checks, and any other sort of Orky warpaint, as well as any of the glyphs.


Using Chainmail and a small brush, start applying metal scrapes across the dabbed on brown-gray painted areas. We want to achieve the effect that the paint has chipped away on the grimy areas. Stippling and streaking are excellent techniques for creating realistic scrape patterns. To stipple, take an old medium sized brush and dip it into your paint. Then, wipe away some of the paint on a tissue. Then, lightly poke the areas you want to stipple, as though you were dotting an "i" when writing. Poke away until you get a nice fading effect between red and silver. To streak the paint, I recommend grabbing a children's watercolor brush, or a brush with really stiff bristles, preferably with irregular bristle lengths. Load up your brush with paint so that the bristles are full up to the handle (this is never recommended when using a nice brush, as it will ruin your brush's point, but we don't really care about this brush. Plus, the worse the brush, the better the streaks!), wipe away some of the paint on a tissue, then quickly work it across the edges of the model with fast directional strokes. Most scuffs and scratches will be horizontal in nature, but feel free to experiment.


Next, basecoat any metal plates on the hull you want to be bare metal with Chaos Black. When dry, hit them with a coat of Chainmail. Next, with a small brush and Chainmail, pick out all the rivets. This is a tiresome process but really makes the vehicle pop. Here we see the wheels and tracks blu-tacked on to get an idea of what our Battlewagon is starting to look like.


Finally, we have an overview of where the model stands after these first few steps. I have not gotten around to painting the roof for the troop compartment or the turrets, but the same processes described above will work.


In Part Two, we will bust out our oil paints (or GW washes if you prefer) and go to town on weathering our metal areas.

~iPaint

Thursday, November 11, 2010

Finished Dark Eldar Warriors

1st 5 Warriors are done. Here's some pics:


Here's how I painted the flesh, since it's bound to come up.

Basecoat Dheneb Stone. Wash with Ogryn Flesh. Highlight with a 50:50 mix of Elf Flesh and Skull White, keeping the darker color in the recesses. Wash again with Ogryn Flesh. Highlight with the 50:50 mix of Elf Flesh and Skull White. Highlight the raised areas with thinned Skull White, almost a 1:2 or 1:3 mix of paint to water, and slowly just build up to a pure white on the highest areas.

I need to seal these guys with another round of gloss and dull coat and they'll be good to go. On to the last 5.

~iPaint

Monday, November 8, 2010

Painting Tutorial: Warhammer 40k Dark Eldar Warrior, Scheme 1

Here's the first painting tutorial, as promised

This tutorial assumes that the model has been assembled and basecoated black.


Step 1: Edge armor plates in Mechrite Red. Basecoat the skin sash in Elf Flesh. Basecoat the Splinter Rifle, highlight the under-armor, and edge highlight the shoulder armor with Codex Grey. Basecoat the arm sash in Goblin Green.

Step 2: Edge highlight armor plates with Blood Red. Wash the skin sash with Ogryn Flesh. Wash the arm sash, under-armor, and Splinter Rifle with Badab Black.

Step 3: Edge highlight armor plates with Solar Macharius Orange. Wash the skin sash with Gryphonne Sepia. Highlight the arm sash with Goblin Green. Basecoat the Splinter Rifle's power supply with Shining Gold.


Step 4: Highlight the skin sash with elf flesh. Wash the Splinter Rifle's power supply with Gryphonne Sepia. Paint the eyes and highlight the armor edges just underneath the eyes with Goblin Green. Basecoat the ammo packs with Bleached Bone.

Step 5: Wash the skin sash with Ogryn Flesh. Wash the ammo packs with Devlan Mud. Wash the Splinter Rifle's power supply with Gryphonne Sepia again. Highlight the eyes and armor edges just underneath the eyes with a 1:1 mix of Goblin Green and Sunburst Yellow. Paint the wire on the model's left shoulder with Sunburst Yellow (2-3 light coats for a smooth finish is what I did since it's such a small piece to paint).

Step 6: Paint all metal areas with Chainmail. Highlight the Splinter Rifle's power supply with Shining Gold. Basecoat bone details and dagger handle with Bleached Bone and give it a quick highlight of Skull White. Once the Chainmail has dried, wash the 2 cylinders on the belt with Badab Black.

Seal the model and base as desired, and the model is ready to bolster the ranks of your growing Kabal.

Have fun and let me know how it works for you.

~iPaint

The Dark Eldar Approach!

So, I picked up a copy of the new Dark Eldar codex at my FLGS, as well as a box of the new Kabalite Warriors.

Within a few hours I had the squad ready to start painting, and a few hours later I had my first test mini finished to my tabletop standard.


Once I knock out a tutorial for this paint scheme, I'll have these guys up on a popular online auction site, so keep an eye out.

~iPaint